
You’re staring down a craving for something complex—bitter, sweet, creamy, and texturally flawless—but your schedule screams for speed. Does achieving that layered, restaurant-quality dessert profile require hours of meticulous work? Not in Chef Jax’s kitchen. We’re applying the high-heat, rapid-prep principles of The Chop & Char Method to a classic, transforming it into a 10-minute active-time powerhouse. Welcome to the ultimate Japanese Coffee Jelly re-engineered for efficiency, where the “Char” is the intense bloom of coffee aroma under heat and the “Chop” is the swift, precise finish.
This recipe proves that disciplined technique trumps time. For more inspired desserts that master texture, explore our Matcha Panna Cotta or the effervescent Sparkling Grape Jelly Panna Cotta. Understanding the science behind the set is key; kanten (agar) is a powerful marine-based gelling agent. For a deep dive into its nutritional profile, see Agar Agar Powder Nutrition Facts, and to explore the fascinating science of gelation, resources like ScienceDirect on Gelation are invaluable.
Why Japanese Coffee Jelly is a Game-Changer for Busy Kitchens
The modern culinary conflict is real: the demand for gourmet flavor versus the scarcity of time. This Japanese Coffee Jelly recipe is the truce. The “Char” here isn’t about grill marks—it’s about harnessing high, direct heat to rapidly extract and caramelize the complex volatile compounds in coffee, creating a profound depth of flavor in mere minutes. The “Chop” is the streamlined assembly: no fussy techniques, just decisive action. It’s about treating your stovetop like a professional’s flattop, where speed and intensity are non-negotiable for unlocking maximum aroma and a perfectly clear, firm set.
Expert Culinary Resources
Mastering high-heat cooking starts with science. The rapid boiling and simmering in this recipe drive off moisture and initiate key reactions, much like the foundational Maillard reaction in searing meats. Precision in the final cut requires professional knife skills for clean, consistent cubes. And while we prioritize speed, we never compromise on quality; sourcing ingredients like single-origin coffee or sustainable agar aligns with principles of sustainable ingredient sourcing for a superior final product.
Ingredients for the Ultimate Japanese Coffee Jelly
Japanese Coffee Jelly Ingredients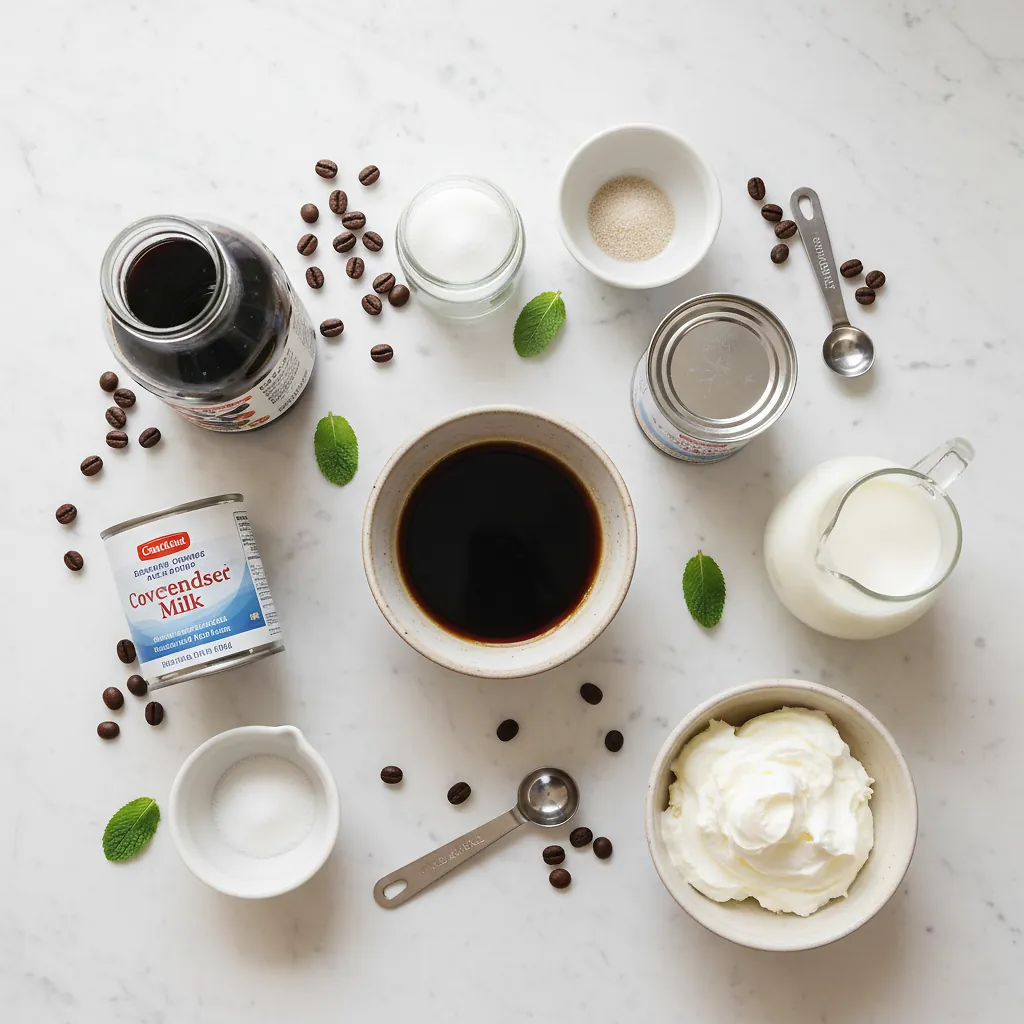
The Chop (Prep & Assembly):
- 2½ cups strong-brewed coffee: The flavor foundation. Pro-grade: A dark roast espresso blend. Supermarket hero: High-quality instant coffee dissolved in hot water works with zero shame.
- 1 stick packet kanten (agar) powder (4g): Your structural commander. It sets firm and clear at room temperature, demanding respect. No substitutions.
- ⅓ cup sugar: The balancing agent. It tames bitterness and promotes a glossy finish.
The Char (Searing & Finishing):
- 3 Tbsp sweetened condensed milk + 3 Tbsp milk: The creamy, caramelized “sauce” sear. Whisked cold for a stark, beautiful contrast.
- Whipped cream, coffee beans, mint: Optional aromatic artillery for plate presentation.
The Science of the Sear: Why This Works
This isn’t just mixing and chilling. This is a controlled thermal event. Bringing the coffee and agar to a full, rolling boil is non-negotiable—it’s the “Char” for the agar strands, ensuring they fully hydrate and disperse. The subsequent 2-minute simmer at a lower heat is the sustained sear, completely dissolving the powder to prevent a grainy, weak set. This high-heat approach mirrors The Chop & Char philosophy: maximum thermal intensity applied in a short, focused window to transform ingredients at a molecular level. Chef Jax’s Pro Secret: The initial vigorous whisk as the liquid heats is critical. It introduces air and ensures no agar powder clumps on the bottom, which are enemy number one to a perfectly clear Japanese Coffee Jelly.
Timing Breakdown: The Chop & Char Method
Prep Time (The Chop): 7 minutes – Measuring, organizing, tool prep.
Cook Time (The Char): 3 minutes – Active boiling and simmering at the stove.
Total Active Time: 10 minutes. The chilling is hands-off. This is the 60-second “Flash Prep” mindset: every movement before heat is applied is deliberate and efficient, setting the stage for an unstoppable, high-intensity cook.
Step-by-Step Instructions
Step 1: The Chop [Mise en Place & Hydration]
Timing: 2 minutes. Measure your coffee, sugar, and agar powder. Have your saucepan and whisk ready. This isn’t passive gathering; it’s tactical staging. Common Mistake: Adding agar to cold liquid and walking away. It must be whisked in as it heats to prevent clumping.
Step 2: The Char [The Boil & Dissolve]
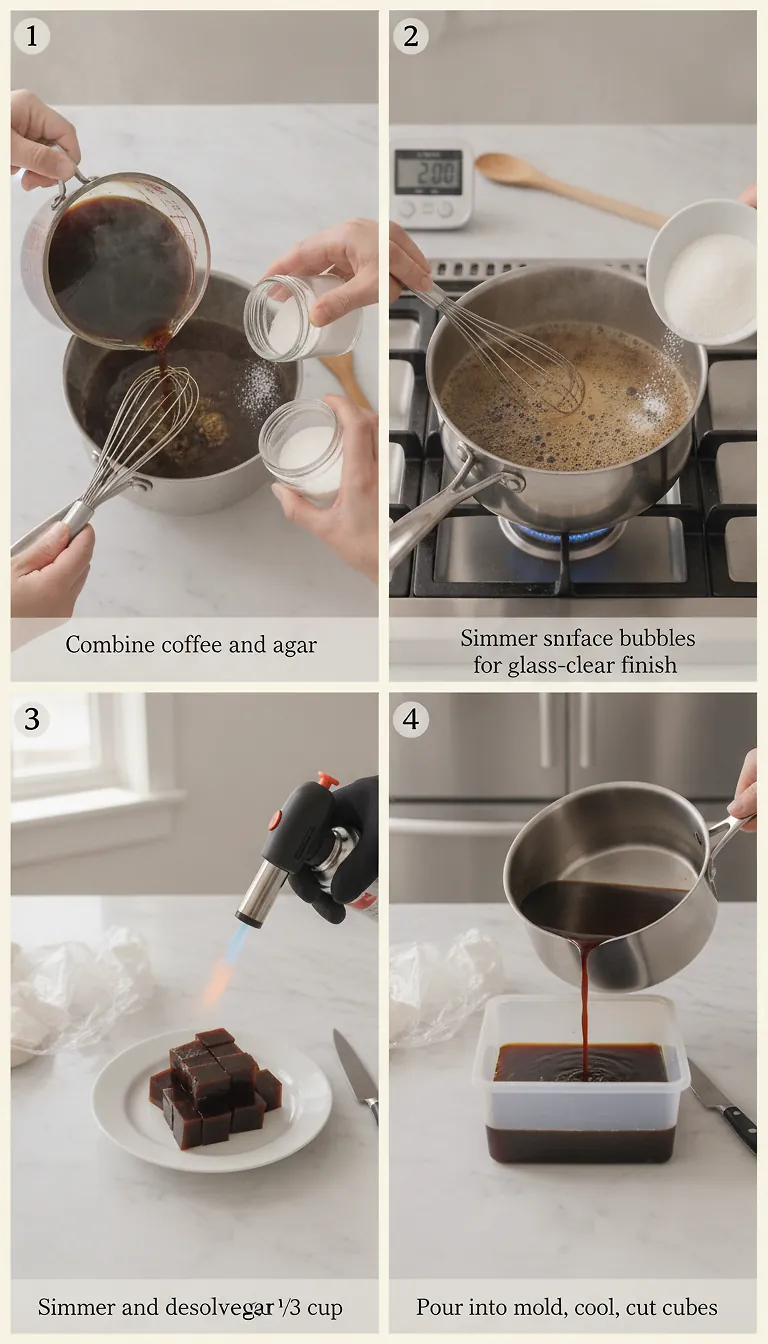
Timing: 3 minutes. Combine coffee and agar powder in the saucepan. Whisk well and place over medium-high heat. Bring to a full, rolling boil. This is your high-heat sear. Immediately reduce to a low simmer for exactly 2 minutes, whisking continuously. The mixture should be completely smooth. Turn off the heat.
Step 3: The Chop [Sweeten & Prepare]
Timing: 1 minute. Whisk in the sugar until fully dissolved. Simultaneously, run your chosen mold under cold tap water. Shake out the excess but do not dry. The damp surface is your non-stick guarantee.
Step 4: The Char [Degas & Set]
Timing: 1 minute. Pour the hot mixture into the damp mold. Immediately pass a kitchen torch or long-stemmed lighter over the surface to pop any bubbles for that professional, glass-clear finish. Let cool at room temperature for 45-60 minutes—this is the carry-over cooking phase where the gel fully forms.
Step 5: The Chop [Final Cut & Sauce]
Timing: 3 minutes (after chilling). Once fully chilled and set (4-5 hours), run a thin knife along the edges. Invert onto a cutting board. Using a sharp, clean knife, cut into ½-inch cubes with decisive, straight-down motions. Whisk condensed milk and regular milk together for the topping sauce.
Pro Tips for Achieving the Perfect Char
- Surface & Moisture Control: The damp mold is the secret to a clean release. No oil or grease needed.
- Pan Temperature Benchmark: You must see active, breaking bubbles during the initial boil. If it’s just steaming, the heat is too low.
- Knife Angle for Faster Prep: A sharp chef’s knife held vertically ensures clean cuts without dragging and smearing the delicate jelly.
- Carry-Over Cooking Awareness: The jelly sets as it cools. Rushing it into the fridge while piping hot can cause condensation and a wet surface.
- Resting Period Importance: The room-temperature cool is crucial for an even, firm gel structure throughout.
Behind the Recipe: Chef Jax’s Kitchen Notes
This version was born during a late-night recipe development sprint. The challenge was clear: capture the essence of a traditional kissaten-style dessert but compress the active labor into a window shorter than a coffee break. The key was respecting the agar—treating its hydration phase not as a gentle simmer, but as a necessary, intense thermal shock. That’s the core of The Chop & Char lifestyle: identifying the single most critical point of flavor or texture transformation and applying focused, uncompromising energy right there.
Perfect Pairings & Signature Dips
Serve your Japanese Coffee Jelly cubes in chilled glasses. Beyond the classic milk topping, drizzle with a burnt honey syrup (honey lightly caramelized in a pan) for a deeper “charred” sweetness. For a non-alcoholic pairing, try it with a smoked cinnamon tonic or a glass of sparkling cold brew coffee. The bitter, creamy, and effervescent notes create a professional dessert course experience.
Frequently Asked Questions
Can I use gelatin instead of agar for this Japanese Coffee Jelly?
No. Agar (kanten) sets firmly at room temperature and can withstand the heat of the coffee without melting, which is critical for the clarity and texture. Gelatin would begin to break down, resulting in a weak, syrupy mess.
Why is the high-heat boil so critical for the jelly set?
Agar powder must reach near-boiling temperatures to fully hydrate and activate its gelling power. An insufficient boil leads to a partial set or a brittle, weeping jelly. This is the non-negotiable “Char” of the recipe.
How should I store leftover Japanese Coffee Jelly?
Store covered in the refrigerator for up to 2 days. The agar base holds very well, though the cut cubes may release a small amount of liquid over time. For best texture, consume within 48 hours.
My jelly didn’t set. What went wrong?
The most common culprit is insufficient boiling/simmering time, preventing full agar dissolution. Ensure a full, rolling boil is achieved and maintain the 2-minute simmer while whisking. Incorrect powder measurement is another potential issue.
Is this Japanese Coffee Jelly recipe vegan?
The jelly base itself is 100% plant-based. Simply omit the dairy-based condensed milk topping and whipped cream. The coffee and agar jelly is naturally vegan and delivers incredible flavor and texture on its own.
Conclusion
This recipe dismantles the myth that sophisticated desserts demand your entire evening. With precise high-heat application and efficient prep—the heart of The Chop & Char Method—you can execute a Japanese Coffee Jelly with the depth and professionalism of a pastry chef’s plating. It’s proof that flavor intensity is a function of technique, not time.
Japanese Coffee Jelly Final Result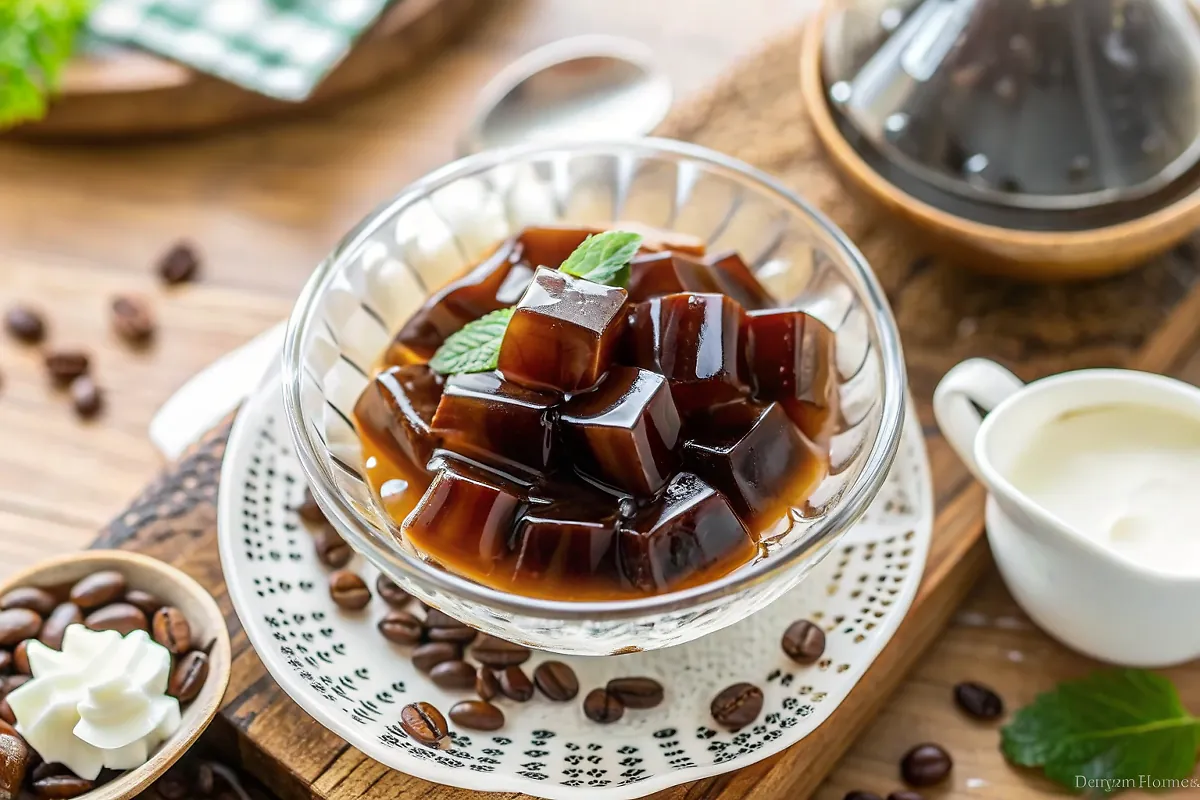
Mastered the Char? Share your kitchen success story in the comments, rate the recipe, and tag us on Instagram and TikTok with #ChopAndChar — Chef Jax might feature your masterpiece in our community spotlight! #TheChar #TheChop #ChefJax #HighHeatCooking #15MinuteMeals
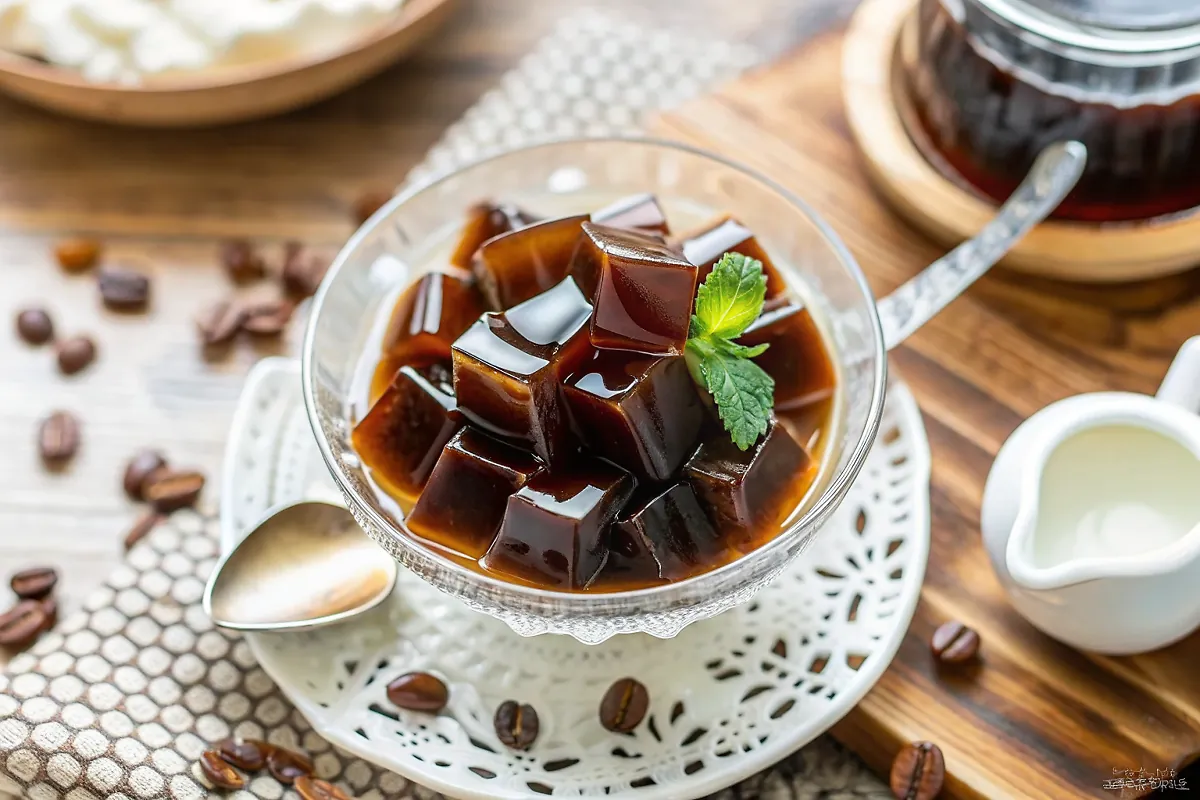
Japanese Coffee Jelly: Perfect 10-Minute No-Bake Treat
Ingredients
Instructions
- Combine coffee and agar: In a small saucepan, combine the brewed coffee and the kanten (agar) powder. Whisk well to disperse the powder.
- Dissolve agar: Bring the mixture to a gentle boil over medium‑high heat, then reduce to low and simmer for 2 minutes, whisking continuously until the agar is completely dissolved.
- Add sugar: Turn off the heat and whisk in the sugar (and instant coffee powder, if using) until fully dissolved.
- Prepare mold and pour: Run a square mold or an 8×8‑inch baking pan under running tap water, shake off excess, and pour the hot mixture into the mold.
- Pop bubbles and cool: Use a kitchen torch or long‑stemmed lighter to pop surface bubbles for a glass‑clear finish. Let the jelly cool to room temperature (45–60 minutes).
- Refrigerate to set: Cover with plastic wrap (place a paper towel underneath to catch condensation) and refrigerate for 4–5 hours until fully set.
- Release and cube: Run a knife along the edges, release the jelly from the mold, and cut into ½‑inch cubes.
- Prepare topping and serve: Whisk the sweetened condensed milk and milk together. Serve the cubes in small bowls, drizzle with the topping, and add optional whipped cream, coffee beans, or mint leaves.